Tuesday, April 30, 2013

Mini Red Velvet Cupcakes


Cupcakes so tender, flavorful, and moist, no one will suspect a thing.

I have a dirty little secret.


These cute, delicious cuppies were made from a mix - the frosting and everything!

It was an experiment of sorts. I scored this mix for 50 cents with a coupon! I wanted to see how it was from a mix before I try my hand at homemade red velvet. I served these at a cook-out and no one was the wiser. They snatched them up very quickly. They were taking the leftovers home without me even offering! Lol.

So I guess you could call it a success. Next time, home made! ;) (Just so you know I'm not completely lazy, I also made 4 dozen cookies from scratch - does that redeem me?)

The box is supposed to make 12 regular sized cupcakes but I decided to make them mini! I made 37 mini cupcakes. Weird.

You add butter and water to the frosting mix. I didn't add as much water as the instructions stated because I wanted a stiffer frosting to pipe with. I actually ran out of frosting and had to use about 1/2 cup of my own cream cheese frosting.


So, if you're in a time crunch or want to try red velvet for the first time, I recommend this cake and frosting mix. :)

Mini Red Velvet Cupcakes with Cream Cheese Frosting

Ingredients:

  • Duncan Hines Red Velvet Cupcake Mix with frosting pouch
  • 2 large eggs
  • 2/3 cup water 
  • 1/4 cup oil
  • 1-4 tsp water
  • 4 Tbsp butter (1/2 stick), softened

Directions:

  1.  Preheat oven to 350 degrees. Line mini muffin pan with baking cups or spray with cooking spray. 
  2. Mix contents of the large pouch into a large bowl. With a handheld mixer, beat on low speed until moistened (no dry pockets). Spoon batter evenly into the cupcake liners, about 2/3 - 3/4 full.
  3. Bake for 9-11 minutes. Begin to check at 9 minutes. Cupcakes are done when a toothpick inserted comes out clean. Overbaking can lead to dryer cupcakes. Cool 5-10 minutes in pan and then remove to cool completely. On the second batch, place the remaining 12 liners dispersed throughout the pan, rather than all on one side. This ensures even baking. 
  4. As the cupcakes cook, prepare the frosting. Beat the softened butter on high for 1 minute, until light and fluffy. Slowly add frosting mix to butter while mixing on low speed. Add 1 tsp of water while mixing. Continue to add the remaining teaspoons of water if a thinner frosting is desired. Scrape sides of bowl. Continue mixing for 2 minutes. 
  5. Frost cupcakes as desired. (I cut the tip off the provided piping bag, inserted a small round tip, and filled the bag with frosting. I then piped a small swirl on each cupcake.) Note: The directions on the box instruct you to pipe some frosting inside the cupcake, however, with mini cupcakes, this will not work. Enjoy!
 Makes about 36 mini cupcakes or 12 regular. Recipe adapted from Duncan Hines.

Process Photos:


Thursday, April 25, 2013

Chocolate Pecan Clusters

This is so simple - it doesn't even qualify as a recipe. It's an unrecipe recipe.


Here's how this chocolatey, crunchy treat came about. It was after I made some truffles in my Truffle Mania. I had leftover melted chocolate. Since I am not one to let chocolate go to waste, I opened the closest cupboard and found an opened bag of pecan pieces. I wonder how that would taste, I thought. I dumped the bag in the chocolate, stirred it up, plopped it on wax paper to set up, and chocolate pecan clusters were born.


Chocolate pecan cluster alongside a piece of white chocolate covered pretzel. 

 They were actually better than I expected. I don't think I've ever had chocolate/pecan combo aside from chocolate pralines. And, you cannot go wrong with pralines. This was straight up chocolate and pecans. So rich, so simple, so easy, so delicious.

Then, convinced that I had created a candy, I went to the web. Whaddya know, they already exist. Most recipes were very similar, although most directed you to toast the pecans. I was not in a position to do that, but you may if you please, or simply buy toasted pecans.

I also came across caramel pecan clusters in my search. Hmmm. I'm also now thinking about pralines.

I may need to buy some more pecans. Pee-cans or pe-cahns? The great debate. However you pronounce them, how about making a chocolatey cluster with them?

Chocolate Pecan Clusters

Ingredients:

  • 1/4 cup melted chocolate (milk, or dark)
  • 1/4 - 1/2 cup pecan pieces (toasted optional)

Directions:

  1. Stir the pecan pieces into the melted chocolate. 
  2. Using a spoon, make piles about 1.5 - 2 inches on wax paper. Allow to set up, about 30-50 minutes, or chill in the fridge to speed up the process. 
Makes about 2 candies.

Note: I was just using up extra chocolate. Feel free to make a much larger batch ;)
For tips on melting chocolate, see this post: http://humancookiemonster.blogspot.com/2013/04/chocolate-tips-tricks.html

Monday, April 22, 2013

Sugar Cookie Dough Truffles

We've finally reached the very last truffle recipe from my Truffle Mania. 


I started out by sharing a version of Cookie Dough Truffles. Cookie dough: free of salmonella, covered in a chocolate shell. I like the sound of that.


Then, things took a turn for the peanut buttery. That's always a good direction to go in my opinion. I shared a small batch recipe for Peanut Butter Graham Cracker Truffles which uses a grand total of 3 ingredients. So much goodness comes from so little.


Next, I shared a dream with you, a Peanut Butter Dream. They're smooth, creamy, and reminiscent of a Reese's egg.


I kept the peanut butter theme going with Chubby Hubby Truffles. I like to call them the ultimate flavor trifecta, combining pretzels, chocolate, and peanut butter.


I hope you're not disappointed to find out the recipe I've saved for last has nothing to do with peanut butter. But, it has everything to do with cookie dough! This time, I've made an egg free sugar cookie dough filling and covered it in decadent white chocolate for a major sugar rush. Sweet tooths rejoice. Sweet teeth rejoice? Whatever, moving on.


Decadent is definitely the word to describe these truffles. Am I the only one who loves sugar cookie dough equally as much as chocolate chip? Cookie dough of any variety works for me.

I knew that I didn't want to coat these candies in dark or even milk chocolate, so I turned to rich and creamy Ghiradelli white chocolate chips. They didn't let me down. Feel free to use a vanilla candy coating. Top with confetti sprinkles because, sprinkles.


Yes, the reason for sprinkles, is sprinkles. Perfect logic. Next time, I plan on mixing sprinkles right into the filling for an added dose of fun and crunch!


If I was a demanding person, I would demand you go make these immediately. I, however, am very reasonable. Thus, I will highly recommend you go make these or another truffle variety unless you have some allergy to deliciousness. In which case, I pity you.

Sugar Cookie Dough Truffles

Ingredients:

  • 5 tsp flour
  • 2/3 Tbsp butter, softened
  • 1 Tbsp sugar
  • Dash of vanilla
  • 1 tsp milk
  • Melted chocolate or candy coating

Directions:

  1.  Mix the butter, sugar, and vanilla until well combined. Add milk 1 tsp at a time, if needed. Mix in flour and sprinkles if desired. Roll into 1 inch balls and chill in fridge or freezer. 
  2. Meanwhile, melt the chocolate or candy coating. Prepare a surface covered in wax paper to allow the truffles to set. 
  3. Remove the balls from the fridge or freezer. Dip in the melted chocolate. Adorn with sprinkles, if desired. Set on wax paper and allow about 30 minutes to set or 10 minutes in the fridge. Eat up!
Makes about 2 truffles. Filling adapted from Willow Bird Baking


Saturday, April 20, 2013

Chubby Hubby Truffles

Math time!

Question:  If pretzels + peanut butter = tasty and peanut butter + chocolate = yummy and pretzels + chocolate = so good, what does pretzels + peanut butter + chocolate =?

Answer:


If you love chocolate covered pretzels, you'll love these. Promise. They have just the right proportions of peanut butter and pretzels to give you a salty sweet experience to be remembered.

Ah, my description can't do it justice. Just take the name, and figure they probably didn't get that name by accident.

And, I cannot get over the cute peanut butter drizzle with crushed pretzel topping. Almost too cute to eat. But almost only counts in horseshoes and hand grenades.

A texture sensation!
 I have only 2 notes of caution:

1.  The peanut butter drizzle doesn't harden at room temperature so if you opt to add that, it will be sticky at room temperature.

2. You will eat these until they are gone. You may want to have someone to share with. Or not.

You've been warned.

Chubby Hubby Truffles

Ingredients:

  • 1/4 cup crushed pretzel pieces
  •  4 Tbsp peanut butter
  • 1/6 tsp butter (a sliver)
  • 1 tsp brown sugar
  • 1/2 Tbsp powdered sugar
  • Melted chocolate

Directions:

  1. Mix the butter and sugars. Mix the pretzel pieces (can be crushed by placing in a baggie and using a rolling pin or can) and peanut butter. Mix both of the mixtures together. Chill in the fridge for about 10 minutes. 
  2. Remove from fridge and form 1 inch balls. Place the balls in the fridge or freezer to chill. Meanwhile, melt the chocolate. (I used semi-sweet). 
  3. Remove the balls from the fridge or freezer and dip in the melted chocolate using 2 forks or spoons. If desired, drizzle with melted peanut butter and crushed pretzel pieces about 20 seconds after dipping in the chocolate. 
  4. Place on a sheet of wax paper and wait about 30 minutes for the chocolate to set or place in the fridge for about 10 minutes. Enjoy!
 Makes about 3-4 truffles. Adapted from Six Sisters' Stuff.


Thursday, April 18, 2013

Peanut Butter Dreams

Ever dream of peanut butter?


These truffles are what dreams are made of. Peanut butter dreams, that is.

They were probably, maybe, my favorite of all the truffles I made during my truffle mania (who can decide between truffles??).

The interior is creamy, dreamy, and smooth while also having a crunch from rice cereal. Both smooth and crunchy? Only in a peanut butter dream.


The filling is reminiscent of the filling for a peanut butter cup. Most peanut butter cup recipes call for a mixture of peanut butter and powdered sugar which gives a thicker texture and a sweeter taste. It is candy, after all. These truffles have that same mixture.

The sweet peanut butter filling is coated with a nice layer of chocolate. I used semi-sweet chocolate chips, however, for a more Reese's type treat, use milk chocolate for the coating. If you really want to get crazy, try coating it with white chocolate. Peanut butter and white chocolate is a very underrated flavor combo! (White chocolate pretzels are also phenom if you happen to have an excess of melted chocolate as I did. ;) )

These are so easy to whip up and they taste like a peanut butter cup. What could be better?!

P.S. If you really want it to taste like a peanut butter cup, you may leave out the rice cereal. The ratio of filling to chocolate will be more comparable to that of a Reese's egg. Alternatively, you may also use mini muffin liners to make true peanut butter cups - the options are endless.

Peanut Butter Dreams 

Ingredients:

  • 1/2 Tbsp butter, softened
  • 1/4 cup peanut butter
  • 3 Tbsp powdered sugar
  • 3 Tbsp rice cereal 
  • Melted chocolate 

Directions:

  1. Mix the butter and peanut butter until combined. Mix in the powdered sugar, adding more if it needs a thicker consistency. Mix in the rice cereal, if desired. 
  2. Roll the mixture into 1 inch balls and chill in the fridge or freezer. Meanwhile, melt the chocolate of your choice. (For tips on melting chocolate, see my post here: Chocolate Tips & Tricks. )
  3. Prepare a plate with wax paper or other surface to put the finished truffles on. Remove the balls from the fridge or freezer and dip them in the melted chocolate. I used two spoons to accomplish this. Place them on the prepared cooling surface. Allow them to sit for about 30 minutes or place in the fridge to speed the cooling process. When the chocolate is set, prepare to experience a dream!
Makes about 6 truffles. Adapted from http://allrecipes.com/recipe/peanut-butter-dreams/

Tuesday, April 16, 2013

Peanut Butter Graham Cracker Balls

Well, these truffles are insanely simple. They have all of 3 ingredients - which you probably have in your house right now.


The title gives away two of the ingredients. Peanut Butter. Graham Cracker. And since it's a "truffle" of sorts, it obviously must be coated in chocolate.


Yet as simple as this is, I managed to botch this recipe in my youth. Which is why I wanted to give it another go and actually succeed. Don't let this scare you. Let me explain.

My friend and I had been out and about and we came home, only to discover that we wanted to make some sort of dessert. To pinterest, we went! It just so happens, I had all the ingredients to this recipe in my house. ;) So, since we were too lazy to go to the store, this was our best choice.

So, here's what I did. I read the ingredients and then went to the kitchen. Did I read the measurements? No...I figured I'd just mix until it was a good consistency. Did I read the instructions? No...who needs 'em? Did I read how to melt chocolate? No....I'll wing it with the microwave, I said.

I didn't literally say that but you get the idea. So, we mixed the peanut butter and graham cracker crumbs and it was hard to stick together. Oh well. Then, we "melted" the chocolate. Only, we cooked it too long in the microwave and it seized up and took on a very thick, frosting like texture. Impossible to dip. It was also impossible to dip since we didn't chill the balls.

Pin-tastrophe
The logical solution was to flatten the peanut butter graham cracker things, spread the seized chocolate on top like frosting, give a light dusting of powdered sugar (for aesthetic appeal, of course) and eat it like a barbarian. Delicious, but not our proudest moment.

This time, things went much smoother. I made a teensy weensy batch of 2 and they were delightful. They have a slightly crunchy interior with a smooth, rich chocolate coating. They're not overly sweet -  there's no added sugar! So if you want a sweeter candy, try using milk chocolate for the coating!

Naked Truffles


Here's how:

Peanut Butter Graham Cracker Balls (Small Batch)

Ingredients:

  • 1 Tbsp peanut butter
  • 1.5 Tbsp graham cracker crumbs
  • Melted chocolate for dipping

Directions:

  1. Mix the peanut butter and graham cracker crumbs thoroughly. Chill the mixture in the fridge for about 10 minutes. 
  2. Remove from fridge and roll into 1 inch balls. Place the balls on wax paper lined plate. Chill in the fridge or freezer. 
  3. In the meantime, melt the chocolate. 
  4. Prepare a sheet of wax paper for the truffles to set. 
  5. Remove the balls from the fridge or freezer. Dip in the chocolate. I dropped the ball in the chocolate, and used two spoons to coat and remove. Set it on the prepared wax paper.
  6. Garnish with mini chocolate chips, chocolate sprinkles, etc. or leave plain. 
  7. Allow the chocolate to set. This takes about 30 minutes. Place them in the fridge to speed up the process. 
  8. Enjoy!
Makes 2 truffles. Recipe adapted from  Baby Gizmo.

Monday, April 15, 2013

Chocolate Tips & Tricks

I love chocolate. I love melting chocolate.

It has the magical ability to turn me into a candy maker. All you have to do is dip, coat or mix something up with the melted chocolate and plop it on wax paper. A few minutes later, you have a tray full of wonderful confections made by you! How did that happen?!


 Chocolate magic.

Alas, chocolate can at times be a bit persnickety so I'm compiling all the tips and tricks I know to working with chocolate.

Melting Chocolate in the Microwave


Melt the chocolate at 30 second intervals or less. 

Chocolate burns very easily so it's best to microwave it in small intervals. You can also set the microwave to 50% power to play it on the safe side. Chocolate becomes lumpy or grainy if overheated. I microwave mine on full power at 30 seconds or less depending on the amount of chocolate. Take into account your own microwave.

Stir the chocolate between each microwaving. 

Chocolate melts from the inside out, so the chocolate may appear to be solid but when you begin to stir it, you will see that it's melting. I've read that you should use a rubber spatula, however I use a regular (metal) spoon and have seen no negative effects.

Make sure the chocolate is in uniform pieces. 

I used chocolate chips, but if you are using a bar, make sure to chop it into uniform pieces for even melting.

Make sure the chocolate doesn't come in contact with water. 

Even just a drop of water will cause the chocolate to seize and become unusable. Make sure the bowl and spoon are completely dry.

Vegetable oil is your friend.

Vegetable oil can be used to salvage overheated chocolate. It can also be used to thin chocolate that's too thick - I often add it to thin my chocolate. I once tried butter before I did any research and it went horribly wrong, so I wouldn't recommend that. I've read that vegetable shortening can be used also. Here's a nestle site that gives specific amounts for salvaging seized chocolate: http://www.verybestbaking.com/Resources/Baking-School/Articles/Seizing-Morsels.aspx.

I don't have a double boiler so I don't have any tips for doing that, but it is the preferred method. If you don't have a double boiler either, don't fret! I always microwave my chocolate without any problems.

Tempering chocolate is recommended so that the chocolate doesn't melt at room temperature and so that it has a shiny appearance and good snap. The process for tempering seems quite complicated so I've never done it. My chocolate does, however, set up at room temperature and I've served truffles at a gathering before and they didn't melt. Most of the time I keep them in the refrigerator just because. So, do what you want in that regard. :)

Truffle Mania
 I hope these tips help you melt chocolate with ease so you can be transformed into a candy making machine!


Saturday, April 13, 2013

Truffle Mania!

Have you ever stepped back and asked yourself: "How did this happen?"


Were you talking about the making of truffles and a sink full of dirty dishes?

No?

Oh, ok then. Me neither.

So, my mom and I were planning a cook out and I was in charge of desserts, of course. I was so excited to try some new recipes and practice my cupcake decorating. I even made a slideshow of choices to show my mom, 'cause that's how I roll.

Then, a dramatic turn of events! Not enough guys could come for football teams and you simply can't have a cook out without flag football! We decided to reschedule to the next weekend. All's well that ends well, right? Maybe so, but I had my heart set on making something this weekend!

So, I decided I would make something anyway. Take that, disappointment! Then, my mind went a thousand different directions; it was chaos. No-bake cookies, yes-bake cookies, blondies for 2, divide a regular blondie recipe in 2, truffles of various kinds, fudge, half a fudge recipe, is it possible to make only 2 pralines? These are the questions that haunt me.

I finally decided to make truffles. But, I wanted to try a bunch of different kinds! So, I scaled down a bunch of recipes and then dip, dip, dipped to my heart's content.


Chocolate got everywhere.

But, I was happy. Even before I ate one, I was happy. Although, I'm pretty sure I consumed about a pound of chocolate in the making of the truffles. Most likely.

So, I'm here to share my teeny batch recipes for several different truffle varieties. One. at. a time. Just to keep you on your toes. ;)

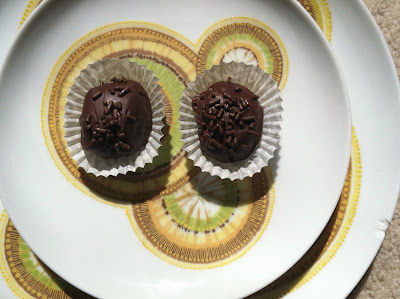
First up, chocolate chip cookie dough truffles! I really question why it took me so long to try these.


I took the recipe for a single, giant chocolate chip cookie from Picky Palate, halved it, and made it egg free but feel free to use your favorite cookie dough recipe. Leave out the egg and baking soda.  Truffle filling: done, and done. So easy, a cave man could do it.

Then, I rolled into balls, chilled, and dipped. Boom, bam, slam! It made 4 truffles, just enough for you and a friend!


Chocolate Chip Cookie Dough Truffles (Small Batch)

Ingredients:

  • 1 Tbsp butter, softened
  • 1 Tbsp granulated sugar
  • 1 Tbsp brown sugar
  • 1/8 tsp vanilla
  • 3 Tbsp flour
  • milk
  • 1 Tbsp chocolate chips
  • Melted chocolate for dipping 

Directions:

  1. Mix the softened butters and sugars until combined. Mix in the vanilla. 
  2. Add the flour. Add milk, one teaspoon at a time until a cookie dough consistency is achieved. Make sure it is not too wet, or it will be harder to roll and dip. Fold in chocolate chips (mini are best). 
  3. Roll the "dough" into 1 inch balls. Place on parchment paper on a plate and chill in the fridge or freezer. 
  4. In the meantime, melt the chocolate in 30 second intervals in the microwave, stirring each time. (I used semi-sweet chocolate chips.) If the chocolate needs to be thinned, add vegetable oil, one teaspoon at at time. 
  5. Prepare a sheet of wax paper to put the truffles to set. 
  6. Remove the balls from the fridge or freezer and dip them in the melted chocolate. I dropped a ball into the chocolate and used two spoons to coat it and lift it out. Then, set the truffle onto the prepared wax paper. Garnish with chocolate shavings, sprinkles, a drizzle of white chocolate, mini chocolate chips, etc. or leave plain. 
  7. Allow the chocolate to set. This takes about 30 minutes or you can place them in the fridge to speed up the process. 
  8. Once set, enjoy the truffles!
Makes about 4 truffles. Cookie dough recipe adapted from Picky Palate.

Thursday, April 11, 2013

Mini Cinnamon Roll Crust Apple Pies

Breakfast of champions?

I won't judge you.

Mini desserts are so much cuter than their regular sized counterparts, and it gives you an excuse to eat two! (The exception to this rule is giant cookies, of course.)

Where did this idea come from? Desperation.

I've seen pictures on pinterest of cinnamon roll crust apple pies - how amazing does that sound? Very. Alas, I only had a small container of pre-made cinnamon rolls (5 count) and my apples fresh from the orchard were running low since I had already made a regular apple pie. What to do, what to do....Make it mini! I wouldn't have it any other way.

I think the name pretty much says it all: Mini. Cinnamon Roll Crust. Apple Pie. That's a triple threat, right there.


I started by spraying a muffin tin with cooking spray. Then, I rolled out the pre-made cinnamon rolls (I used Pillsbury, 5 count package that comes with cream cheese icing), and used them to "line" the cups of the muffin tray.

I halved my favorite apple pie recipe and diced the apples, rather than sliced. Since I didn't want the cinnamon rolls to burn, and because the pies were so much smaller, I wanted to be sure the apples were small too so they could cook thoroughly.

I filled the cups with the apple pie filling and then topped with streusel! I'll take a streusel topping over a top crust any day.

Bake them for about 20 minutes and serve with the provided cream cheese icing or à la Mode.


Let's just say, I know from personal experience that both options are delicious. ;)

They are so irresistible - classic apple pie + warm, fluffy cinnamony goodness + streusel topping = positively cinn-ful! 

I can't resist a good pun. Dough well. 

Ah make the corniness stop! 

Anyway, make these, you won't regret it!


Mini Cinnamon Roll Crust Apple Pies

Ingredients:

  • 5 count Pillsbury Cinnamon Rolls
  • 3 cups diced tart apples (about 2-3 medium)
  • 1/4 cup + 2 Tbsp granulated sugar
  • 2 Tbsp flour
  • 1/4 tsp cinnamon
  • 1/4 tsp nutmeg

For the Streusel:

  • 1/2 cup flour 
  • 1/4 cup butter or margarine, firm
  • 1/4 cup brown sugar

    Directions:

    1. Preheat the oven to 425 degrees. Spray a muffin tin with cooking spray and set aside. Separate the cinnamon rolls and roll each one out large enough to line a cup in the muffin tin. Line 5 of the cups with the cinnamon rolls.
    2. Dice the apples. Mix the apples, sugar, spices, and salt. Fill each cup with the apple filling. 
    3. For the streusel, be sure the butter is cold. Cut the flour and sugar into the butter until crumbly or use a food processor and pulse until crumbly. Sprinkle over the apple pies. 
    4. Bake for 15-20 minutes. Check often to make sure the cinnamon rolls and streusel aren't burning. If they begin to burn, cover with aluminum foil. 
    5. Serve warm with icing or ice cream.  
    Warning: You may have a small amount of apple filling left over depending on how much you fill the cups. Makes 5 mini pies. Filling and streusel adapted from Betty Crocker's Cookbook. 


      Tuesday, April 9, 2013

      XXL Chocolate Coconut Cookie

      Ahem. Allow me to introduce you to Mr. Massive Cookie of All That is Good in This World.


      You may be familiar with Mrs. Massive Cookie

      For those days when you have an XXL chocolate craving most days, because chocolate is one of the essential food groups, this cookie fits the bill.

      There's just something about giant cookies that makes them better. It is a phenomena that may never be explained. Until then, I will continue to revel in the joy, that is, massive cookies. Join me, won't you?

      This XXL chocolate cookie has a chewy edge with an intensely chocolatey and fudgy center. I am now being notified that "fudgy" is not a word. This is unacceptable; I will be contacting Merriam Webster at once. 

      Whether it's an actual word or not, you get the idea. The cookie has a brownie-like texture in the middle and is so rich! 

      I loaded this cookie up with coconut M&M's. Mine happened to be in the shape of eggs (clearance candy anyone?) but regular coconut M&M's will work fabulously! If you can't find those, look for almond joy pieces; they taste eerily similar. 

      This was my first time ever tasting a coconut M&M. It won't be the last. Let's just say, it's a good thing I added them to the cookie dough before I tasted them, because otherwise, there may not have been any left for the cookie. I'm still trying to figure out how they get all that coconut taste in there.

      The flavor combo of chocolate + coconut is amazing, but feel free to add whatever mix-ins you like. You could try York peppermint pieces, Reese's pieces, peanut butter chips, chocolate chips, etc. Most anything will taste delicious when embedded into a giant chocolate cookie. 


      This cookie is simple and easy to make, just the way I like it.

      You start with 2 tablespoons of butter, add a few tablespoons of sugars and mix with a spoon or a fork - no mixer needed!


       (I tried to take a lot of pictures for this post, bear with me!)

      Then, add 2 tablespoons of beaten egg (crack an egg, beat it, and measure out 2 tablespoons), and your vanilla extract.


      Finally, sift the dry ingredients together and add them to the dough.  Add your coconut m&ms or mix-ins of your choice.


       Take a look at this beautiful softball sized ball of cookie dough.


      The dough will be very sticky, so you'll have to use a spoon to make a ball on the baking sheet. Then, bake the cookie for 14-16 minutes and enjoy the chocolate coconut feast!


      XXL Chocolate Coconut Cookie

      Ingredients:

      • 2 tbsp butter or margarine, at room temperature
      • 2 tbsp granulated sugar
      • 2 tbsp brown sugar
      • 2 tbsp beaten egg
      • 1/2 tsp vanilla extract
      • 1/4 cup flour
      • 2 tbsp unsweetened cocoa powder
      • 1/2 tsp baking soda
      • 1/4 tsp salt (omit if using salted butter)
      • 1/3 cup coconut M&M's + a few to top it 

      Directions:

      1. Preheat oven to 350 degrees. Line a baking sheet with parchment paper and set aside. 
      2. In a medium size bowl, mix the butter and sugars together until creamed. Mix in the beaten egg and vanilla. 
      3. In a separate bowl, sift together the flour, cocoa powder, baking soda, and salt. Add the dry ingredients to the wet and mix to combine. Make sure there are no dry pockets of cocoa powder. Fold in the coconut M&M's. 
      4. Place the dough on the center of the baking sheet and use a spoon to shape it into a ball. Top the dough ball with a few more M&M's or chocolate chips. 
      5. Bake for 14-16 minutes. Do not over-bake. The cookie will appear soft but will firm up as it cools. Allow the cookie to cool completely on the baking sheet. 
      Makes 1 XXL cookie or 4 regular size cookies (adjust baking time). Recipe adapted from Sally's Baking Addiction.